
How to Sublimate a Tapered Tumbler
Tapered tumblers look great, but they punish shortcuts. Wrap a rectangle around one and the design slides downhill, the seam won't meet, and text ends up slanted. Here's the full process, from template to finished tumbler, with the one step most people skip.
By the CraftSizer team · Updated 2026-10-12
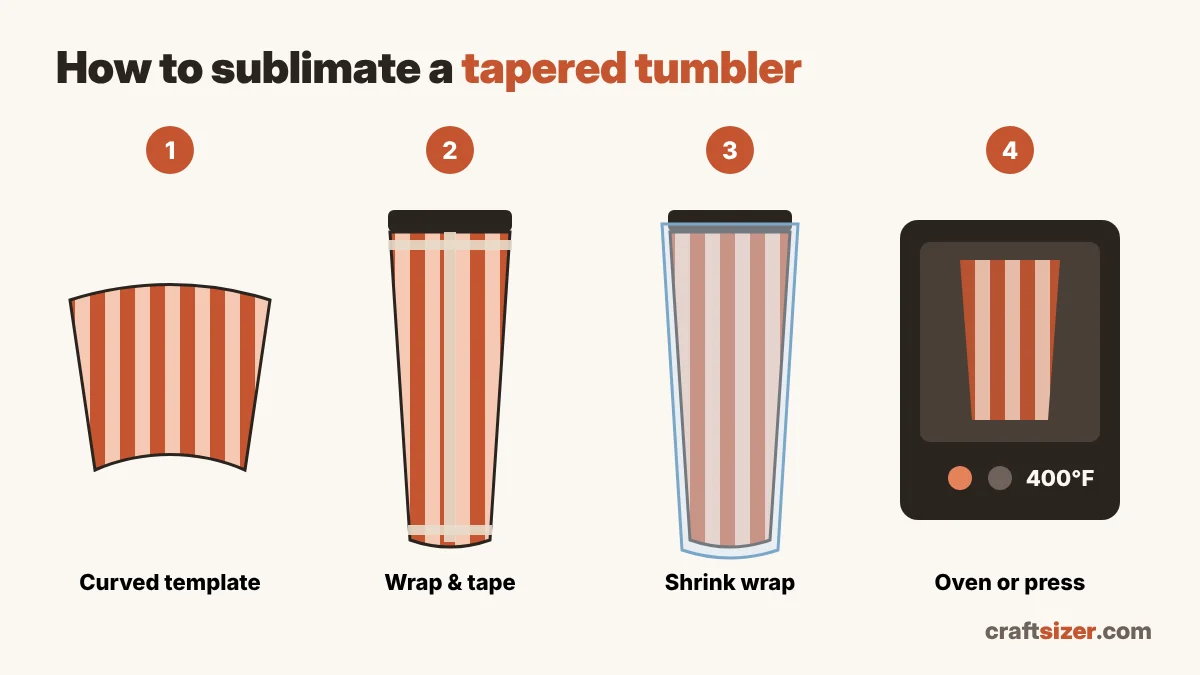
Why tapered tumblers are different
A straight tumbler is a cylinder, and a cylinder unrolls into a rectangle. A tapered tumbler is wider at the top than the bottom, so it's shaped like a cone with the tip cut off. That shape unrolls into a curved band, like a slice of a rainbow. Your design has to be bent into that same curve before you print it. This is the step most people skip, and it's the reason so many tapered prints come out crooked.
What you need
- A sublimation-coated tapered tumbler (plain stainless steel won't take sublimation ink)
- Sublimation printer, sublimation ink and sublimation paper
- Heat-resistant tape
- Sublimation shrink wrap sleeves sized for your tumbler
- A convection oven used only for crafts, or a tumbler press
- Heat-resistant gloves
- A heat gun, if your shrink wrap needs pre-shrinking
Step 1: Measure the tumbler
You need three numbers: the circumference near the top of the printable area, the circumference near the bottom, and the printable height. A paper strip works better than a tape measure. Our guide on how to measure a tumbler walks through it in detail.
Step 2: Make the curved template
Enter your three measurements in the tapered tumbler template generator. It calculates the exact arc for your tumbler. You have two options:
- Download the blank template and use it as a guide in your design app.
- Upload your finished flat design and let the tool warp it into the arc for you. This is the faster route, and it runs in your browser, so your design stays on your device.
Design at 300 DPI if you can. A design that's too small for the template will print soft; the DPI checker tells you if it's sharp enough.
Step 3: Keep important details in the safe zone
- Keep names and text at least half an inch away from the seam.
- Leave a little space at the top and bottom edges, where the paper is most likely to lift.
- Use a background that continues across both ends, so a small overlap at the seam disappears.
Step 4: Print
Print on the coated side of the sublimation paper, which is usually the brighter white side. Most sublimation designs with text need to be mirrored; check what your printer software and paper recommend. Use your printer's higher-quality setting for stronger color.
Step 5: Trim along the curve
Cut the paper along the outer and inner curves, leaving only a small margin. Extra paper bunches up against a tapered wall and causes uneven pressure. The two straight ends of the arc become your seam.
Step 6: Wrap and tape
- Wrap the printed side against the tumbler, curved edges at the top and bottom. The wide curve goes at the wide end.
- Bring the two ends together and tape the seam first, flat and tight.
- Add tape along the top and bottom edges so the paper can't slide.
- Run your fingers over the whole wrap. You're looking for a snug fit with no gaps against the tumbler.
If the ends overlap too much or don't reach each other, your measurements are off. It's better to re-measure now than to waste a blank.
Step 7: Shrink wrap
Slide a shrink wrap sleeve over the tumbler. If your sleeves need pre-shrinking, warm them with a heat gun, working from the middle outward so air isn't trapped. The wrap should press the paper evenly against the whole surface, including the narrow bottom.
Step 8: Press
For tapered tumblers, a convection oven with shrink wrap is usually the most reliable method, because it presses the curved surface evenly. Many tumbler presses are built for straight tumblers and may need a tapered attachment or rotating halfway through.
Typical starting points are in the sublimation time and temperature chart. Treat them as a starting point: follow your blank's instructions, preheat fully, and test one tumbler before a batch.
Step 9: Unwrap and cool
Wear gloves; the tumbler will be very hot. Remove the shrink wrap and peel the paper in one smooth motion straight away, without letting it slide across the surface (that's what causes ghosting). Let the tumbler cool before adding the lid.
Troubleshooting tapered prints
| Problem | Likely cause | Fix |
|---|---|---|
| Design slopes or tilts | A rectangle template was used | Use a curved template |
| Seam ends don't meet | Circumference measured wrong | Re-measure with a paper strip |
| Faded band near the bottom | Paper not pressed tight at the narrow end | Trim excess paper, tighten the shrink wrap |
| Faint double image | Paper moved while peeling | Tape more, peel in one motion |
More fixes are in our guide to common sublimation problems.
Frequently asked questions
Can I use a straight template on a tapered tumbler?
Not well. A rectangle wrapped on a tapered tumbler tilts toward the narrow end, so text slopes and the seam won't line up. Use a curved template made from your tumbler's measurements.
Is a convection oven or a tumbler press better for tapered tumblers?
A convection oven with shrink wrap usually gives more even pressure on a tapered shape. Many tumbler presses are designed for straight tumblers and may need a tapered attachment.
Do I need to mirror the design for a tumbler?
Most sublimation designs with text should be mirrored so they read correctly after transfer. Check the recommendation for your printer software and paper.