
How to Make Stickers with a Cricut
Cricut's Print Then Cut feature turns your home printer and cutting machine into a small sticker shop. Your printer prints the design with a border of registration marks, and the machine reads those marks to cut around each sticker. Here's the whole process, step by step.
By the CraftSizer team · Updated 2026-11-09
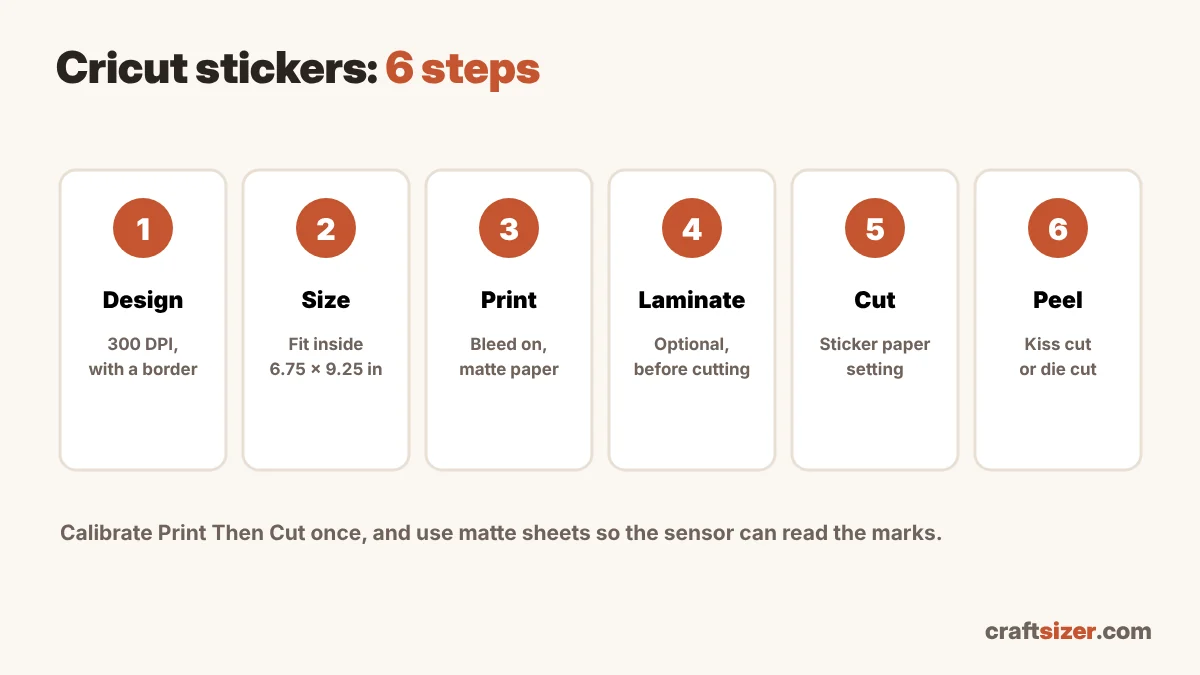
What you need
- A Cricut machine that supports Print Then Cut (Maker, Explore and Joy Xtra models do; check yours in Design Space)
- An inkjet printer
- Printable sticker paper, ideally matte. Vinyl sticker paper is more durable; paper sticker sheets are cheaper
- Optional: clear laminate sheets for scratch and water resistance
- A LightGrip or StandardGrip mat
Step 1: Prepare your design
Make each sticker at about 300 pixels per inch at its final size. A 3-inch sticker needs about 900 pixels across. Check your files with the DPI checker.
Add a white or colored border (an "offset") around die-cut designs. It makes small cutting errors invisible and gives the sticker a clean shape. In Design Space, the Offset tool does this: create the offset, then Flatten the design and its offset together so it prints as one sticker.
Step 2: Size and arrange the stickers
The classic Print Then Cut limit is 6.75 × 9.25 in on letter paper. Newer versions of Design Space allow a larger area (about 7.44 × 9.94 in) with the corners kept clear. Leave about a quarter inch between stickers so the bleeds don't overlap.
| Sticker size | Per letter sheet (classic) | Per letter sheet (larger area) |
|---|---|---|
| 1.5 in | 20 | 20 |
| 2 in | 12 | 12 |
| 2.5 in | 6 | 6 |
| 3 in | 4 | 6 |
Try other sizes and paper in the Print Then Cut size calculator. Not sure what size to make? See the sticker size guide.
Step 3: Print with bleed on
Click Make It, then Send to Printer. Leave Add Bleed on: it prints a little extra color around each sticker so a slightly off cut doesn't leave a white edge. Turn on Use System Dialog if you want to choose your printer's paper type and quality settings. Let the ink dry for a few minutes.
Step 4: Laminate (optional)
A clear laminate sheet over the print makes stickers more scratch and water resistant. Apply it before cutting. Glossy laminate can make the registration marks harder to read; if that happens, cover the marks with a strip of matte tape, or trim the laminate so it doesn't cover them.
Step 5: Cut
Place the sheet on the mat in the top-left corner, matching the mat's grid. Choose a sticker paper material setting that matches your sheet (for example a "Sticker Paper" or "Printable Vinyl" setting), load the mat, and let the machine find the marks before cutting.
- Kiss cut: cuts through the sticker but not the backing, so you get a sheet of stickers to peel. This is what sticker paper settings do by default.
- Die cut: cuts through the backing too, giving single stickers. Use a heavier material setting or extra pressure, and test on one sticker first.
Step 6: Peel and pack
Unload the mat, then peel the mat away from the sheet (rather than the sheet from the mat) so it doesn't curl. Weed the extra paper from around kiss-cut stickers, or pop out die-cut ones.
Common problems and fixes
- "Unable to read registration marks": use matte paper, try in a room with less direct light, and check the marks are fully printed and not covered by shiny laminate.
- Cuts are off the design: run the Print Then Cut calibration in Design Space, and make sure the sheet is in the top-left corner of the mat.
- White edges: turn bleed back on, or make your offset border a little wider.
- Blurry stickers: the image is too small for the size. Use a larger file or make the sticker smaller.
Planning to sell them? Here's how to price stickers so the time you spend pays.
Frequently asked questions
What is the max sticker sheet size for Cricut Print Then Cut?
The classic limit is 6.75 × 9.25 inches on letter paper. Newer versions of Design Space allow about 7.44 × 9.94 inches with the corners kept clear for the registration marks.
What paper do I use to make stickers with a Cricut?
Printable sticker paper for inkjet printers. Matte sheets work best, because glossy surfaces can make it hard for the sensor to read the registration marks.
Can a Cricut make waterproof stickers?
Printable vinyl with a clear laminate on top makes stickers that resist water and scratches. Plain paper sticker sheets are not waterproof.
What's the difference between kiss cut and die cut stickers?
A kiss cut goes through the sticker but not the backing, leaving stickers on a sheet. A die cut goes through the backing too, making individual stickers.