
How to Make Waterproof Stickers with a Cricut
Regular sticker paper is fine for planners and notebooks, but on a water bottle it can smear, wrinkle and peel. Waterproof stickers come down to two things: a vinyl base instead of paper, and a clear layer over the ink. Here's how to make them with Cricut Print Then Cut.
By the CraftSizer team · Updated 2026-11-10
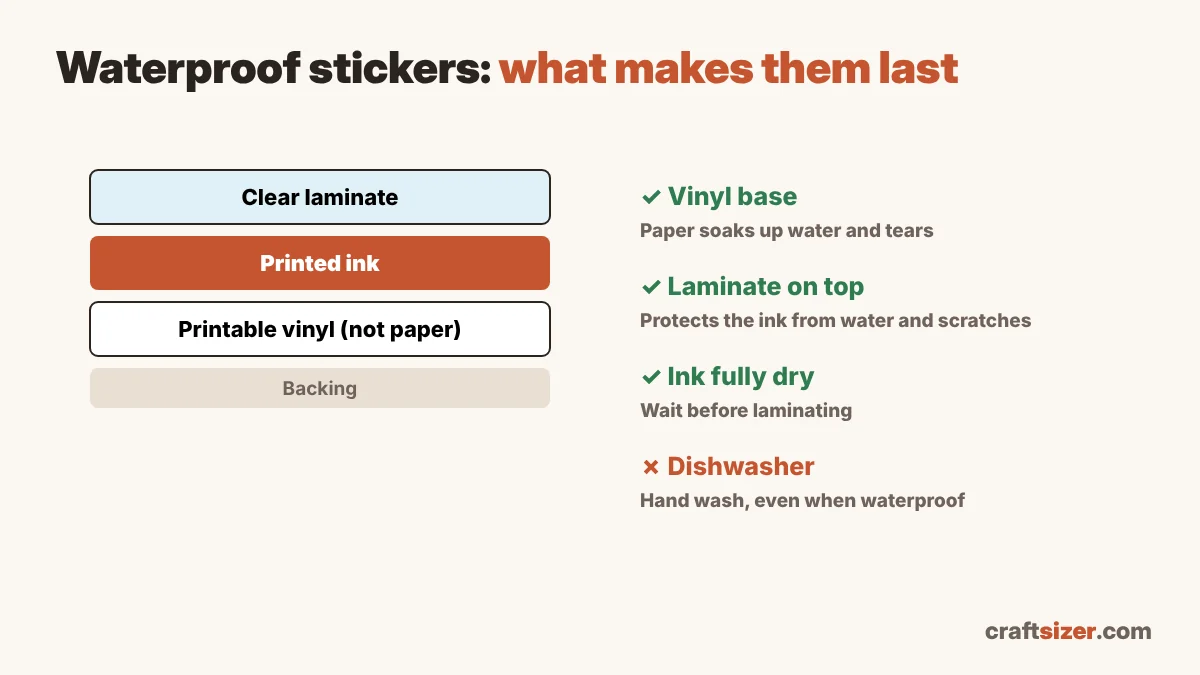
What makes a sticker waterproof
| Material | Water resistance | Best for |
|---|---|---|
| Printable sticker paper | Low: ink can run and paper wrinkles | Planners, packaging, envelopes |
| Printable vinyl, no laminate | Medium: the base is waterproof, but the ink can still scratch or smear | Indoor items |
| Printable vinyl + clear laminate | High: the ink is sealed in | Water bottles, tumblers, laptops, outdoor items |
| Waterproof sticker paper with laminate included | High | The easiest all-in-one option |
"Waterproof" usually means it survives splashes, rain and hand washing. Most homemade stickers still shouldn't go in the dishwasher.
What you need
- A Cricut that supports Print Then Cut (Maker, Explore or Joy Xtra)
- An inkjet printer
- Printable vinyl or waterproof sticker paper
- Clear laminate sheets (self-adhesive, matte or glossy)
- A scraper or brayer to smooth the laminate
Step by step
- Design and size your stickers at about 300 pixels per inch, with a border around each one. Keep them inside the Print Then Cut area (6.75 × 9.25 in for the classic limit). The Print Then Cut calculator shows how many fit per sheet.
- Print on the vinyl side with bleed on. Use your printer's best quality setting.
- Let the ink dry. Give it at least 10–15 minutes, longer in humid weather. Laminating over damp ink can smudge it or trap moisture.
- Laminate. Peel back an inch of the laminate's backing, line it up with the top edge of the sheet, and smooth it down slowly with a scraper as you peel the rest. Work from the center out to push out bubbles.
- Cut. Choose a material setting for printable vinyl or laminated sticker paper, and test on one sticker. Laminate adds thickness, so you may need more pressure.
- Peel and test. Run one sticker under the tap and rub it with your thumb before you make a batch.
Matte or glossy laminate?
- Glossy makes colors pop, but can reflect the sensor light and cause "unable to read registration marks" errors. If that happens, cut the laminate so it doesn't cover the black marks, or cover them with matte tape.
- Matte reads easily, hides fingerprints and looks more premium on many designs.
Tips for long-lasting stickers
- Size for the surface. On water bottles, about 2.5–3.5 inches works best, and taller designs curve better than wide ones. See the sticker size guide.
- Apply to a clean, dry surface and press firmly from the center out.
- Round the corners or use a die-cut shape with a border. Sharp corners lift first.
- Price for the extra material. Vinyl and laminate cost more than paper. See how to price stickers.
New to Print Then Cut? Start with how to make stickers with a Cricut.
Frequently asked questions
Are Cricut stickers waterproof?
Only if you use printable vinyl or waterproof sticker paper and cover the print with a clear laminate. Plain printable sticker paper is not waterproof.
Can you laminate stickers before cutting with a Cricut?
Yes. Laminate the printed sheet first, then cut. Matte laminate is easiest for the sensor to read; glossy laminate may need the registration marks left uncovered.
Are waterproof stickers dishwasher safe?
Most homemade waterproof stickers survive splashes and hand washing, but not the heat and detergent of a dishwasher. Hand wash items with stickers.
How long should ink dry before laminating stickers?
At least 10 to 15 minutes, and longer in humid weather, so the laminate doesn't smudge the ink or trap moisture.